
A double-ender can improve your audio quality, as well as minimize your chances of losing a recording session. While Zoom, Google Meet, and other similar video conferencing platforms have taken the internet by storm for streamlining meetings, classes, and other vital events online, many podcasters use them to record their podcast interviews. It is important to know these platforms come with many disadvantages, which can severely ruin the entire podcast’s quality.
Double-ender recording could be the ideal solution for you. Countless podcasters are adapting to this technique, and the results are incredible!
Hence, without any further delay, let’s get into more detail about the significance, pros, cons, and process of double-ender recording for podcasts today.
What Is Double-Ender Recording?
In the simplest terms, double-ender recording requires both the host and the guest or co-hosts to record their parts of the conversation, which are later synced together during the post-production processes.
Even if adding multiple tracks together may sound complicated, it is much better than compromising the podcast quality due to network connectivity issues which are highly common in remote recordings.
What Are The Benefits Of Double-Ender Recording?
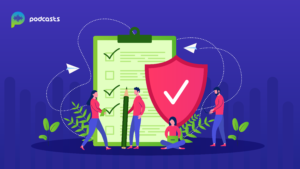
The double-ender recording is an excellent solution for podcasters who struggle to maintain quality during their remote podcasts. Some of the significant benefits of double-ender recording include:
Studio Quality Audio & Video
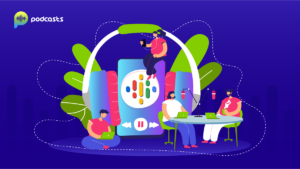
Your podcast quality has a lot to do with your audience retention rate. To ensure the quality of your podcasts even while recording remotely, double-ender recording is the best solution!
With double-ender recording, you can create studio-quality audio and video remote recordings without any restrictions. Your quality is entirely independent of the internet connectivity, which was a major issue with the regular modes of podcast recording.
Switching to the double-ender recording will ensure good-quality podcasts even if you are two continents apart.
Uncompressed Files
Many times while you save the recorded podcasts after recording from the video conferencing platform, it tends to automatically compress the file, which can result in quality issues again.
With double-ender recording, there is no audio file compression requirement until you are running out of space in the device. With an uncompressed audio file, the sound quality will be as original and flawless as ever, resulting in a high-quality audio experience for your listener.
Additional Security
Believe it or not, there have been so many instances in a podcaster’s life wherein the audio somehow gets lost or damaged even after releasing it. This surely creates a dent in all the efforts and time you spent creating the podcast.
With double-ender recording, your podcasts are safe and secure at two different locations. Your podcasts are not affected by any environmental conditions or mishaps such as computer crashes or malware attacks in your system. You can always retrieve the file from your guest or co-host, and you are good to go!
The Problem With Using Skype For Podcasts
Most podcasters who do not have access to a designated radio station will not have ISDN for their remote recordings. In such cases, Skype and other similar video conferencing platforms are likely the only choices left for the creators. However, there are several drawbacks when you record a podcast via skype call. Let’s check out some remote recording issues with skype that double-ender recording can solve for you.
Connection Issues
Skype typically has a very unstable connection at times, which can halt the connection in several instances. You can even lose the connection while being in the middle of the conversation, which can significantly degrade the overall quality and flow of the podcast.
Audio Syncing Issues
While recording, at times, the audio doesn’t sync with the video, which could result from pretty much any issue such as network connectivity to glitches in Skype. Again, such audio sync issues will overall degrade the essence of your podcast.
Errors
Starting from audio errors to lossy audio. The list of errors that accompany skype recordings is limitless.
Poor Sound
As we said, your podcast quality is highly dependent on your network connectivity. Apart from network issues, skype’s recording feature typically doesn’t record the full spectrum of the human voice, which can hamper the organic flow of the podcast.
Horrid Sound
Even if you have a soundproof studio, you can still find at least one such unnecessary sound that the recording captured from skype.
Crappy Sound
Like horrid sounds, skype brings several unnecessary sounds within the recording, which gets complicated to remove during the post-production processes.
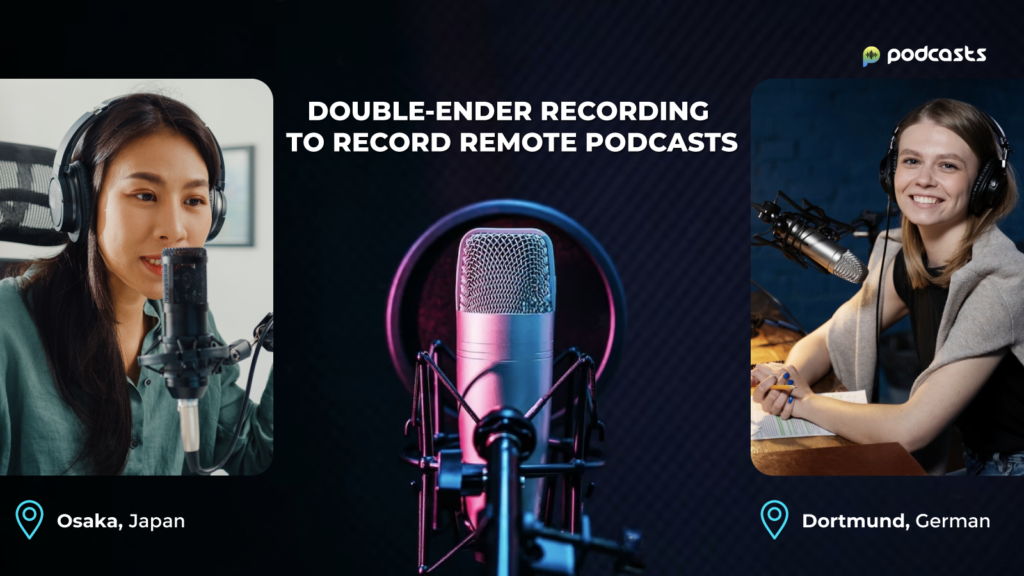
Double-Ender Recording Technique: The Secret to Interviewing Remote Podcast Guests
With so many issues on Skype, nothing beats the Double-ender podcast recording technique for remote recording. Here’s the complete guide on the secret to interviewing remote podcast guests with the best audio quality!
Recording With Audacity: Your Guest Has A Microphone
If your podcast guest or co-host has a microphone they are comfortable using, ask them to download the open-source recording and editing software Audacity.
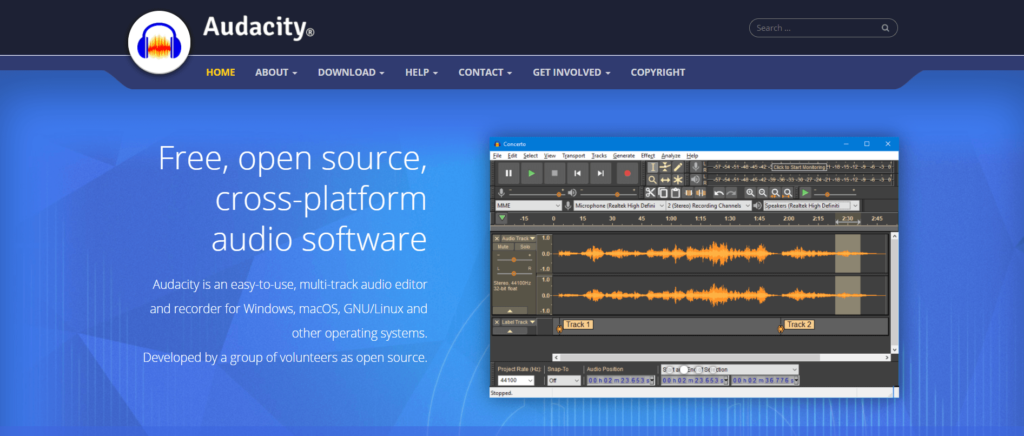
While the interface of Audacity is simple and beginner-friendly, you may need to instruct them while adjusting the settings for the desired results. Here’s the process to record the best podcasts with your guest or co-host on Audacity:
Step 1: Ask them to plug in the microphone on the system. From the drop-down menu in the right microphone icon, they need to choose their USB microphone. The microphone is now recognized.
Step 2: Instruct them to set the middle menu to Mono recording and the last drop-down menu to the same USB microphone or speakers as per the equipment they are using to listen to the audio.
Step 3: At the bottom of the same screen, ask them to confirm whether the project Rate is set equal to the bitrate as the recording software. It should typically be 44.1 kHz or 48 kHz.
Step 4: Now, hit the Red circle button to view the waveform as you start recording the podcast.
Now that the podcast recording is done, just hit the Stop button and save the file. To save the file, they need to go to File > Export Audio and save it to their computer. Ask them to share a copy of the audio file via any file-sharing platform like Google Drive, Dropbox, etc.
The Book Stack Method: Your Guest Doesn’t Have A Microphone
In case your guest or co-host does not have their microphone, which is common if they are not a podcaster, the book stack method is the next best solution. Here’s what they need for the book stack method:
- Any Android or Apple smartphone with a voice recording application
- A stack of books( at least 6-8 depending on the thickness)
- A table near their computer or laptop.
The process here is even simpler here. Just ask them to stack their books together precisely at the table where they will be putting their laptop or at the computer table. They need to ensure that the stack of books is high enough to keep the phone at its top and at the same level as their mouth.
Once the arrangements are made, the podcast recording is ready to start!
Some extra tips or better recordings:
- Ask them to silence their phone notifications during the recording.
- Plugin earphones while recording to prevent capturing your voice twice into the recording.
- Keep the microphone of the smartphone pointed straight towards the mouth.
- The distance of a smartphone should not be more than six inches away from the mouth.
- Try the “clap sync” trick again to test the audio sync before you start recording the podcast.
After you have finished recording the podcast, ask your guest to stop the recording and save it. After saving the recording, ask them to share it with you, as we mentioned before.
Best Method: Hand Recorder
Another easy method for a double-ender recording is to use an external handheld microphone. Any portable mic that gives you good-quality audio output and suits your podcasting needs is perfect here.
Pro Tip- Syncing
While recording with multiple participants, every individual would ideally have their double-ender setup to record studio-quality sound for the podcast. You can also do a marker with the “clap sync” method and align the timing of the claps across the tracks later during the post-production process.
Just count down from 3, and all the parties will clap together at the same time in the mic, and you can now get started!
Good Method: Smartphone Recording
If the other participants do not have an external recorder, you can still get studio-quality recordings by attaching an external microphone to their IOS or Android. However, this can cost them space and battery in the smartphone since podcast audio files are typically larger. Thus, an external microphone is typically the most appropriate step here.
Pro Tip – Microphone Choice
You can find multiple good-quality USB microphones at a reasonable price for recording podcasts. You can suggest a few of your choices and ask them if they can switch to external microphones instead of using the smartphone microphone. At times, manufacturers add low-quality omnidirectional microphones to devices like computers or smartphones, which do not capture the best audio quality.

If they still cannot access an external recorder or microphone, you can still record remotely to the computer’s hard drive. It involves routing your computer audio to two pieces of software simultaneously with no extra requirements of any gear.
In a Pinch: Computer Recording (If don’t have an extra microphone or an external recorder)
To route the audio tracks, you need to use any virtual audio mixer like Voicemeeter or Soundflower.
Here you are routine both Skype and any recording software like Audacity. This creates a common channel to record the tracks through the same microphone and send them to the virtual mixing software. Even though it may get slightly tricky due to the complicated processes of setting up and troubleshooting, it is preferable if you try out the process a few times yourself before the final recording day for your convenience.
However, this can also bring the same issue you would face with smartphones – Memory! You also have other potential risks like losing audio files if your computer crashes or loses power while recording the podcast.
You can also try out call recorders like SquadCast, and Riverside. fm, etc., which allows users to run double-ender recordings by recording every participant locally and storing them in the cloud.
Video conferencing platforms like Skype, Zoom, etc., offer a wide range of facilities when it comes to remote recording. However, this can never restrict content creation. Techniques like double-ender recording provide the right men to record studio-quality podcasts without any restrictions.
Conclusion
All you and your guests or co-hosts need is a simple hand recorder with a good-quality microphone, and you have the simplest way of recording high-quality podcasts remotely. There are other complex procedures too, which we have discussed above. You eventually have to align it with your guests and choose the right method accordingly!